5 Steps to Calculate Your Conversion Rate on Facebook

A lot of times, we talk about the need for particular metrics, and how some metrics are worth a lot less than others. Usually, it’s metrics like raw clicks, views, and likes that are deemed useless, while other metrics like conversion rate are the real important numbers.
The reason for this comes down to pragmatism. If you’re running a business, you’re in it to make money. Getting 100 likes on a Facebook post doesn’t earn you a single cent. Earning a single conversion does. Conversions allow you to figure out how well your marketing is doing, so you can balance it against your investment and determine your profit margins.
How do you calculate your conversion rate on Facebook? Here’s a five step process you can follow.
Step 1: Define a Conversion
The first thing you need to do before you can even begin to calculate your conversion rate is to figure out what, exactly, you want to call a conversion.
What is and is not a good conversion? That’s the trouble, isn’t it? There are a lot of different actions you can consider.
A conversion needs to be a specific, singular action that a user can take.
A conversion needs to be an action with tangible value to your business.
A conversion needs to be a specific action that you desire the user takes.
A conversion needs to be an action you can track in a defined way.
A user clicking “like” on your video can be a conversion if your end goal is likes, but it generally won’t be. A like doesn’t get you anything. It doesn’t benefit your business beyond the incredibly minor additional chance of going viral. Even then, going viral is only beneficial inasmuch as it can increase other conversions.
Opening an email is a conversion, if your goal is to track your email open rates. Simply opening an email is not something I would usually count as a conversion, though, because it’s not itself a beneficial action. It’s one step towards a conversion in my process.
Clicking on a link in an email is closer to a conversion. It’s typically the conversion tracked by email marketing teams, because the goal of your email campaigns is to get people to click through to your website. The same goes for ads on Facebook and Facebook posts, usually; the conversion is a visit to your website.
If you want to be more narrow about your conversions, you need to consider specifically what your reward is. If you’re comparing simple dollar values, so you can calculate your return on investment for ads, a conversion is anyone who makes a purchase on your site.
Now, this can be tricky to track if you aren’t sure what you’re doing. After all, how do you connect a user who clicked on a Facebook post link to a user who made a purchase on your website. There are analytics to do that, and link tracking modules, and so on, but there’s one good way that I’ll get to in a moment.
One thing many newcomers miss is that you don’t usually have one “conversion” to track. One business will have many different conversions. Clicking a link through to your website can be a conversion. Clicking to fill out an email opt-in form can be a conversion. Making a purchase can be a conversion. One user can do all three of these, and can thus be the source of three conversions. This is why a single conversion is not necessarily a single person.
Step 2: Install the Tracking Pixel
Once you have defined your conversions on paper, you need to figure out how you want to track them on Facebook and on your website. The answer is mostly to use the Facebook Tracking Pixel.
The Facebook pixel is a piece of tracking code that you add to your website. You will need to be logged into the Facebook account that controls the page you’re using associated with your website. This link should take you to the Pixels tab in your Events Manager. If it doesn’t work, click this link and then click their link in step 1.
You will be given the landing page pitch for the pixel. Feel free to read it if you like. You need to click Create a Pixel to proceed with the process.
Name your pixel. You have plenty of space to create a name, so name it something that reminds you it’s the pixel relevant to the specific business you’re tracking. You only need to have one pixel per website, but if you’re operating multiple websites for multiple businesses, you may want more than one pixel. You should also input the website URL for your website.
You’re limited to one pixel unless you use the Business Manager. You can do that if you like; I’m not covering the process here because this is intended to be a first time guide more than an advanced multi-business management tutorial.
When you click to create the Pixel, Facebook will do a bunch of loading in the background and then will present you with a setup method. You can email the pixel code and instructions to your developer, you can use integration code with apps, or you can install it manually. The apps Facebook’s tag manager works with are BigCommerce, Google Tag Manager, Magento, Segment, Shopify, Squarespace, Wix, WooCommerce, and a bunch more. You can see the full list in their platform integrations page.
In this case I’m assuming you can follow the instructions relevant to your situation. To install it manually, you will need to copy the pixel code Facebook provides and paste it into the Header of your website. Thankfully, Facebook makes it very easy to make sure you’re copying the full code, rather than forcing you to specifically highlight and copy the code segments.
If you have tracked data about your customers in the past, you can enable Automatic Advanced Matching to attempt to match your mailing list to existing Facebook accounts, and so on. This can be a good way to get a head start on data collection.
Once you have pasted the Pixel code into your website, you will want to test it. Send test traffic via the widget and wait for Facebook to receive and verify it. Once it works, your Pixel will be installed.
Step 3: Set Conversion Tracking Actions
Once your pixel is installed, you will need to set the specific actions you want to have count as conversions. Facebook divides these into three categories: standard events, custom events, and custom conversions.
Standard Events are events that Facebook assumes most businesses want to track, and are already configured on the Facebook end. For example, making a purchase is an event that’s standard to every shop that sells any item. You can set the Purchase event to your store page on each item, along with the price of that item and its currency. Facebook will then know how much each item in your store is worth to you and can track when a user referred by Facebook makes a purchase.
Standard events include adding payment information, adding a product to cart, adding an item to a wishlist, completing a registration form, filling out a contact form, customizing a product, using a donate button, searching for your location, initiating the checkout process, submitting their information as a lead, delivering a pageview, making a purchase, scheduling an appointment, making a search, starting a free trial, submitting an application, subscribing to a service, or viewing specific content.
Custom Events are events that track in the same way as other events, but are not necessarily something that Facebook figures is widespread enough to track in a preconfigured event. For example, you might configure an offer so that when a user shares a page on your site, they get 10% off their product purchase. This isn’t a standard event, but it can be tracked in the same way; you simply need to use the trackCustom string with the appropriate custom labels.
Custom Conversions are specific custom events that are tracked as conversions rather than just events. It’s basically a shortcut to a certain kind of categorization of data in Facebook insights.
If all of this sounds pretty confusing, that’s okay. It’s fairly easy in practice. You already have a list of conversion actions you want to track, so all you need to do is use the Facebook events manager – the same place you used to generate your pixel – to create an event for each conversion. Each one will generate you a bit of code that you plug into your website in the relevant place, such as a confirmation window, a submit button, or a thank you page.
You can read the in-depth documentation for developers on this page, if you want to know specifically what parameters are required for what events. Mostly, you can just follow Facebook’s wizard to have the hard part handled for you through simple and explanatory dialogue boxes.
Step 4: Calculate Conversion Rates
Tracking your conversion rates on Facebook should be easy from here. You have Facebook’s pixel set up to track your data, so now you need to get that data. Facebook can’t track data from before it was installed, so you need to send more traffic to your website. That means running Facebook ads, making organic posts, boosting posts, and generally using Facebook as the marketing channel you intend it to be.
Facebook will track a bunch of different metrics for traffic and for conversions. The “visit conversion rate” for example will track your conversion rate from among the people who visited your site. If 10,000 people view your Facebook post and 1,000 of them click through, you have a base of 1,000 visitors. If 500 of them convert, you would have a 50% visit conversion rate. That’s a total conversion rate of 5% of the people who actually saw the post in total.
Facebook is a little tricky with some of the data they track. Keep in mind that your specific conversion rates might not be accurate; you’ll have a small margin of error. Some tech-savvy users, for example, use script blockers that prevent Facebook from tracking their activity outside of Facebook itself. You will record the visit, but not the conversion, even if you get the conversion in the first place.
Step 5: Compare Your Data
At this point, you have conversion rate data, but what does it tell you? One data point is not necessarily helpful. Here are some comparisons you can make:
- What is your conversion rate this month compared to last month? You need at least two months of data to make this comparison, but it’s a good idea to monitor your trends over time.
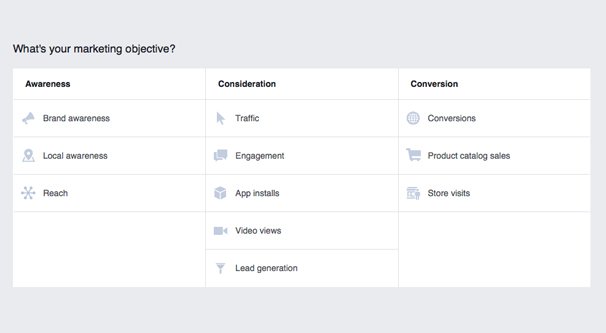
- What is your conversion rate for specific ads? When you run Facebook ads, you can choose conversions as your objective. This will give you specific conversion rate data about each individual ad, which you can compare to other ads or to your organic efforts.
- What is your conversion rate compared to other marketing channels? You can set up similar tracking for Twitter, and Google Analytics will allow you to track events in a similar way, though you should make sure you’re not double-tracking conversions.
- What is your conversion rate in comparison to your industry? There are some fantastic data sets out there which you can use to benchmark yourself against your industry and against similar industries.
Conversion rates are very good pieces of data to have, both for the here-and-now and for benchmarking over time. How well are you performing?


