5 Ways to Embed Your Instagram Posts on Your Website
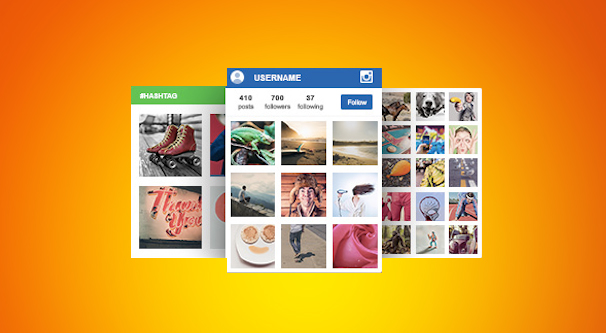
When you want to show off something on Instagram in your blog, there are a few ways you can go about doing it. Depending on how you set it up, you may have more or less control over the way Instagram displays on your site. Here are a few options, for when you’re interested.
1. Taking a Screenshot
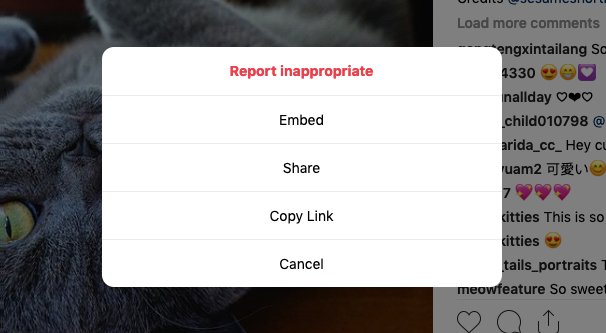
Not technically an embed, a screenshot is sort of like an insurance policy. After all, think about it; how many times have you been browsing a blog post relating to Instagram that’s more than a year or two old, and seen “examples” that are embedded posts that no longer exist? Either the URL changes, the post is deleted, the user is deleted or banned, or Instagram just changes the way their embed code functions and ceases supporting the older version. Here’s a screenshot of a post, for example:
Taking a screenshot is exceptionally good for cases where a post might disappear. For example, a photo of partial nudity that may or may not violate the Terms of Service, and as such, might exist only so long as it’s not reported or caught by the robots. Spam posts work the same way; they’ll exist for a while, then eventually disappear. Not that you want to promote a spam account with a real embed, but you might consider using one as an example to show off different types of spam when you’re writing about black hat techniques or something.
Screenshots are extremely common for times when a business or celebrity says something controversial. It’s a regular occurrence these days for a controversial post to be deleted, even though everything is saved in the eyes of the internet.
Personally, I think screenshots have their place, but are not necessarily always going to be the ideal choice. If you’re embedding your own content, for example, you will know if it’s going to be removed and an take action to rectify the situation. That said, I like to take screenshots and use them as an alternative load in case the embed fails; that way there’s a backup there.
For posts that are generally safe, or for blog articles that aren’t likely to have a long life, you don’t necessarily need to worry about using a screenshot. If your topical article about a specific hashtag’s usage won’t matter in two years, who cares if some of the posts disappear? It’s more work to maintain an archive at that point anyway. Really, it’s up to you.
2. Native Instagram Embed Code
Instagram natively has a way you can embed posts in your content. When you visit a post on Instagram, you can copy some embed code and paste it into your website to have it embed the post in your blog. Using that same cat post, here’s how you do it.
From a PC, navigate to the post you want to embed. In this case, all you have to do is click that link a line up above.
In the lower right corner, next to the “add a comment” box, you will see three dots. Click those and a lightbox will appear that has several options in it. In this case, the option you want to choose is “Embed.” Click it and it will adjust to a box that has code in it and the option to include the caption or not. Click to copy the embed code and you will be given something that looks like a huge mess of code. I’d paste it here, but seriously, it’s a lot and looking at the code alone won’t help you.
When you paste that code into your website, ideally it will render appropriately as some HTML that embeds the Instagram post. This requires access to the Instagram API, though, which means primarily that Instagram reserves the right to IP or domain ban your site. If you’re embedding content in a way that harasses users, exploits a scam to farm likes, or maliciously uses their content in any way, you may have your access to the API revoked.
View this post on Instagram
As mentioned, embedding a post will work just fine right up until the post is removed for some reason or the code is broken in some way. A poor copy and paste will break it, trying to edit the code might break it, and the post being deleted will leave you with a “this post as been removed” image embedded in your blog article. Not a great look, of course. In most cases, you should be just fine. In some cases, though, your blog platform might not like raw code in your composition window. If that’s the case, there are still a few options.
3. Embed Instagram
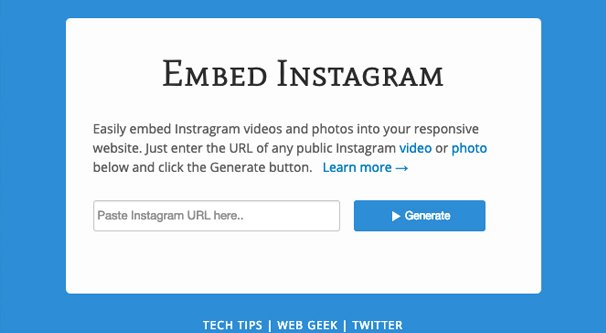
No, I’m not just telling you to embed Instagram as another option. There’s an actual service called “Embed Instagram” by CtrolQ.org that came to popularity early on in Instagram’s life, when the platform was only really accessible via mobile device. Since the actual embed code can only be fetched via a desktop platform, you need something else if you’re working primarily with the app.
In an app, you can see an options menu when you view a post. Tap the options menu and one of the options will be “copy link”. This is meant for you to share the link with others or post it on a different site, like a web forum. When you copy a link to a post, like that cat post, you’ll get something that looks like this: https://www.instagram.com/p/Btg1jd_HJsT/
Take that link on over to Embed Instagram here. Paste the link into the box and click the Generate button. It will load for a minute and then show you a preview of the media you’re going to embed, to make sure that you’re choosing the right photo and didn’t accidentally copy the wrong URL. The resulting code will be a fairly short block, much shorter than Instagram’s default embed code. When you paste it in, it’ll look a little like this:
Credit: @World of Meows 🐱🐱🐱
This embed code defaults to a 612×621 pixel square, but you can adjust the specific size of it to fit your design. Simply adjust the width and height code to specify percentages or pixel numbers. Or don’t, if it looks fine! The code uses responsive design, so it will resize automatically to fit the size of the user’s browser, as determined by the space you leave it in your site layout and your own responsive design. You are using a responsive design, right?
4. Instagram Feed WordPress Plugin
If you’re using a site based on the WordPress framework, and you’re having trouble with either of the above embed methods – or if you simply want something with more control to it – you can use a WordPress plugin for your Instagram embeds.
The Instagram Feed plugin is one such option. This particular plugin is developed and maintained by Smash Balloon and has been, as of this writing, updated a mere two months ago. As usual, I tend to avoid plugins that are not actively updated, because they can lose functionality or become security issues over time. This plugin is used by over 700,000 users, so it’s not likely to be abandoned any time soon.
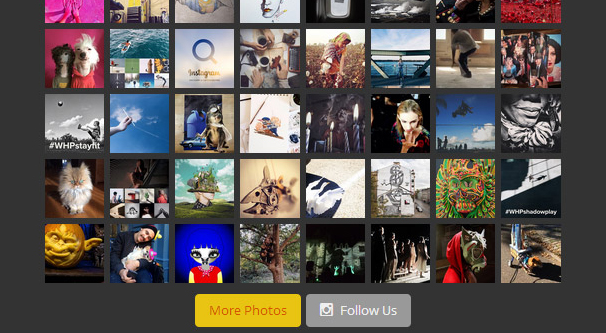
This plugin gives you a ton of functionality. You can embed a single post, but more than that, you can embed an entire Instagram feed. Not only that, but it’s not just your feed, or just the feed of someone else; it’s a custom curated feed including just the content you want to share. You can have multiple Instagram accounts feed into it.
The plugin feed can be configured in a variety of ways. It’s responsive design by default, so it adapts to the space you give it and the size of the device viewing it. You can also specify the exact width, height, number of photos it displays at once, number of columns of images, the size of the images, the background color, the spacing between the images, and just about anything else. You can also create multiple different feeds and display them on different parts of your site.
The base plugin is free, but they also have a Pro version. It can display hashtag feeds, show images in a pop-over lightbox, and can allow users to post comments directly or like photos from the embed. It can also allow carousels, specific highlight layouts, and it can display captions. You also have access to a more advanced moderation system to control what shows up.
The pro version costs $39 for one site license, and you can buy either the WordPress plugin or a custom script for non-WordPress sites to mimic the functionality. There are also scale licenses; for $79 you get five sites, and for $119 you get unlimited sites along with priority support. It’s also worth noting that these are one-time purchases, not monthly fees, as so many other apps and plugins are these days.
If you want to see what a feed looks like, you can view their Pro demo here. It can show you different styles, from the basic grid feed to the carousel and the masonry layout only available in the pro version. Like what you see? It’s pretty cheap!
5. Embedly
Embedly is a web service that connects API to API. Major sites like Medium use it from a business perspective, to allow embedding content on their site without needing to jump through code hoops. For example, on Medium, you can simply paste in the Instagram URL (https://www.instagram.com/p/Btg1jd_HJsT/) into the compose window and it will automatically generate the embed. In fact, trying to use method #2 up there with the actual embed code will not work! Embedly handles the whole thing on the back end.
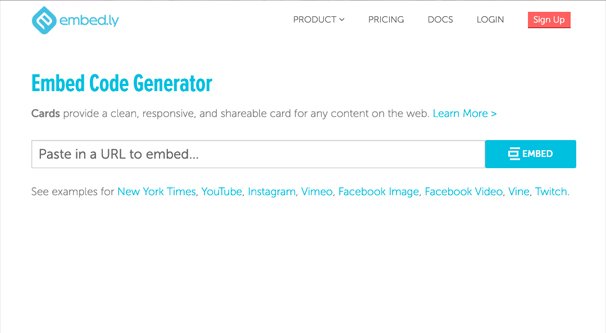
Now, you don’t need to buy a business license to use Embedly. Good thing too; a business license starts at $99 per month, though it does cover over 500 different content providers and a bunch of different APIs. No, all you need to do is use the Embedly Embed Code Generator. Go to that link and plug in the Instagram URL.
When you plug in the URL, you will be given a few options and a preview. You can choose whether or not to show social buttons, whether or not you want a dark theme, and if you want an SEO embed. You can also specify a custom width or leave it to auto, and whether you want it left-, right-, or center aligned. Then, just click to copy the embed code, and paste that code into your site.
I want those treats right meow. 😻😻😻. Follow @worldofmeows for more Credits @sesameshorthair
1,211 Likes, 18 Comments – World of Meows 🐱🐱🐱 (@worldofmeows) on Instagram: “I want those treats right meow. 😻😻😻. Follow @worldofmeows for more Credits @sesameshorthair”
You can use the card – which is what Embedly calls each individual embed – for free, but they will cajole you into signing up for the cards-only account. That cards-only account gives you analytics for your card and removes the “provided by Embedly” branding you see on the free card. IT also allows you to use an embed button and a bookmarklet, if you want. It’s $9 per month, but I would only recommend it if you’re very frequently using their service to embed content.
Your Turn
Do you have an alternative embed service you like to use? Have you found screenshots more useful than I give them credit for? Let me know in the comments.


