


How to Stream Pre-Recorded Videos on Live Social Posts
Facebook and Instagram have both introduced and promoted live streaming video on their social networks, and both of them have been huge hits. Facebook’s is on par with both YouTube Live and Twitch in terms of audience sizes and engagement, and while Instagram is historically a different style of network, it’s also quite well-loved amongst users.
What happens, though, when you want to use a live stream to get that sweet, sweet engagement, but you aren’t very good at the whole “live video” thing? Maybe you’re not good at answering questions, maybe you stutter without a script, maybe you just want something with more polish and more effects than what you can deliver with a live feed. Who knows, maybe you’re good at it, but you just don’t have time during peak hours when your audience is most alive.
The simple solution is to just… not do it live. Oh, you still use the Facebook, Instagram, YouTube, Twitch, Mixer, or whatever live feed, but you don’t broadcast a live video. There has to be a way to do it, right? Well, you’re correct, there is. Here’s a general outline of a process you can follow, though if you want to use a different system or setup, your configuration might look a little different. I’ll try to provide some alternatives where appropriate.
Step 1: Determine Your Platform
The first thing you need to do is figure out what platform you’re going to be using to broadcast your content to your audience. There are a lot of different streaming platforms out there today, since it’s an emerging technology and everyone is trying to get a piece of the pie with their own innovations.
- Facebook. Facebook has the power of already being where a huge amount of your audience is. These people already follow you, they’ll get your notifications, and you can run advertising to them promoting your upcoming live stream.
- Instagram. Instagram, like Facebook, may already have your audience on it, assuming you’ve kept up an active profile. People on Instagram are also highly engaged and used to watching live, impromptu content with Stories as well, so they’re primed to watch. Unfortunately, streaming outside of the Instagram mobile app is limited and difficult.
- YouTube. If you have an active YouTube account, you may have an audience ready and willing to watch your broadcast just like you do on Facebook. YouTube has a slightly different kind of setup, though, and not all of the broadcasting options I’ll mention below work with both YouTube and something like Facebook together.
- Twitch. Amazon-owned Twitch is probably the largest and most engaged streaming platform out there, though Facebook gives it a run for its money. Unfortunately, streaming is core to its mission, so you aren’t likely to have an audience already watching. It also tends to be focused on things like gaming and crafting, so a pre-generated advertising video might not get much traction.
- Mixer. Mixer is Microsoft’s answer to Twitch, and while it has been picking up steam, it still has the same selection of benefits and drawbacks as Twitch, without being as popular.
There are others, too, but these are the big ones. Others may be smaller competitors, or they may fill niches like “a streaming service for Asia” or “a streaming service where they don’t filter for copyrighted material” and, as such, aren’t the primary target for our mission here.
I recommend picking one platform to start. With some clever software configuration – or some particular, expensive apps – you can broadcast to more than one platform at the same time. However, since this is more complicated than just using one platform, I recommend sticking to one for now. You can always expand later if you find your audience is diverse enough to have two distinct presences simultaneously.
For most of the rest of this post, I’m going to go with Facebook as the primary option. Keep in mind that what works for Facebook will probably work for YouTube and Twitch as well, but you may need something different for Instagram due to the limitations on that platform.
Step 2: Learn Your Audience
At this point, you need to know enough about your audience to know what kind of stream will attract them. Will they come to check out a product demo or new announcement, or do they only want to show up if they have a chance to engage with you and have their questions or concerns directly addressed? This will help guide the kind of content you produce.
Unfortunately, if you haven’t really experimented with live video before, there’s not much way to tell what your audience is going to prefer. This isn’t something you can find in Facebook’s Insights panel. You simply have to run videos of varying types to see how your audience responds.
Step 3: Produce a Video
Once you know the kind of video you want to broadcast, you need to produce it. The nice thing here is that, by producing a video ahead of time, you can polish it. If you flub a line, you can re-record it. If something weird happens, like your lights go out, you can fix it and try again. You can cut out awkward silence, you can splice in product images, overlays, and credits, and you can add all manner of effects.
There are two ways to go about this, really. The first is to create a polished video that is obviously not actually live and just go with it. It’s more like a TV show or a commercial at this point, but broadcasting it live with hype can still be effective. Plenty of big name brands do this all the time to announce new and upcoming products or content.

The other option is to create a video that pretends to be live, but just “ignores” the chat. Rather than responding to people in your chat, you just go on with pre-selected questions or comments, or you just treat it like a one-take live stream without the audience. This might not even stand out, since plenty of very large streams ignore their chat simply because there’s too much going on to monitor live.
Either way, you want to produce a video that fits Facebook’s video standards – or the standards for whatever other platform you’re using – and isn’t going to run afoul of issues like copyrighted content in your broadcast. The last thing you need is for the background music in your carefully produced video flagging your account with a copyright strike.
Step 4: Configure a Broadcasting Program
Now we come to the tricky, technical part. In order to broadcast a pre-recorded video live, you need to set up a streaming program in a very particular way. There are several options for this, so first you need to pick your program.
- LiveReacting – This is a program specifically created for marketing livestreams. It has a variety of features you don’t see in most streaming programs, such as games and countdowns, and it allows streaming a pre-recorded video to Facebook and other platforms. It has a limited free version that caps you at 15 minute videos and watermarks your stream, though, so you may need to buy either credits or a monthly plan to get the most out of it.
- OneStream – This is another marketing-focused streaming platform that works with a variety of different streaming platforms and offers a bunch of interesting features, like automatic scheduling and a sweet analytics dashboard. The free plan caps you at 5 minutes, but doesn’t watermark you, so that’s nice. Paid plans start at $10 per month.
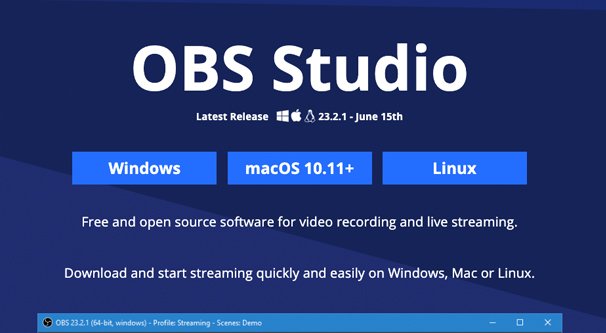
- OBS – The Open Broadcaster Software is the industry standard for game streaming, though it falters a bit at the professional level. It’s broad and openly configurable, it’s open source, and it’s stable, but it may take some configuration to work with any particular platform. On the plus side, it’s completely free.
For apps like LiveReacting, you upload a video to their system and it handles the details. For OBS, you will need to add a stream source and, rather than a game capture or camera source, capture a monitor with a video window already open. Consider zooming in a bit so that even if there’s an accidental mouse movement or other interaction, the video controls won’t be visible.
Note: If you want to stream pre-recorded video on Instagram, you need a different kind of workaround. Instagram operates entirely through its own app, and doesn’t support RTMP streaming through third party apps. You need something like this to broadcast on Instagram, and even then it’s a little sketchy. Use at your own risk.
Make sure to run some tests! Livestreaming requires an appropriate level of upload bandwidth for your internet connection, unless you’re using a cloud-based service that handles it for you like LiveReacting. You need to configure audio levels, video bitrate, and a lot more. Everyone will have a different set of configuration options based on what program, what platform, and what infrastructure they’re using, so read some guides and learn what works for your setup.
Step 5: Promote Your Coming “Live” Stream
Any time you’re going to broadcast live, regardless of platform, you need to promote it. If it’s just a casual, regular stream, you can promote it to your audience on social media and maybe run a few ads. If it’s a one-time and important product announcement or other high-profile show, you should dedicate some more time to hyping it up, post about it and link to it on your website, and otherwise prime your audience with plenty of FOMO to make sure they’re present at the right date and time.
Protip: For major, one-off events, create a Facebook event page and advertise it to get people to RSVP to watch the stream. Some platforms also allow you to do things like give away prizes to viewers, though you may need to research a chatbot for that functionality.
Step 6: Monitor Your Stream
Just because you set up a pre-recorded video doesn’t mean your stream will be fire-and-forget. You still need to monitor it, for two reasons.
First, you want to monitor the stream itself to make sure your audio levels are fine, your video isn’t stuttering or skipping or somehow buffering, your bitrate isn’t muddying it, and it isn’t either invisible or broken in some way. There are a lot of things that can go wrong, which is why testing is so important.
Second, you want to monitor your chat. Most of the time your chat will be fine, but you may want to moderate it to make sure spam comments are deleted, hateful commenters are banned, and even questions are actively answered.
Step 7: Follow Up on Your Broadcast
Once you’ve broadcast your stream, follow up. Some platforms allow you to schedule re-runs for your videos, or archive your streams – and chats – so latecomers can view it after all. These can be a good idea if you want to make your video available to everyone. However, this generally works best with actual live streams.
Since your video is pre-recorded, unless you really want the chat to survive, you can simply upload the video as, well, a video. This has the added benefit of being able to upload it to other platforms, like YouTube, as well.
And, of course, you need to follow up on the hype. If you announced a new product, release the product page and start taking orders. If you scheduled a regular show, start working on the next episode. Keep the hype train rolling and take advantage of that sweet audience engagement.